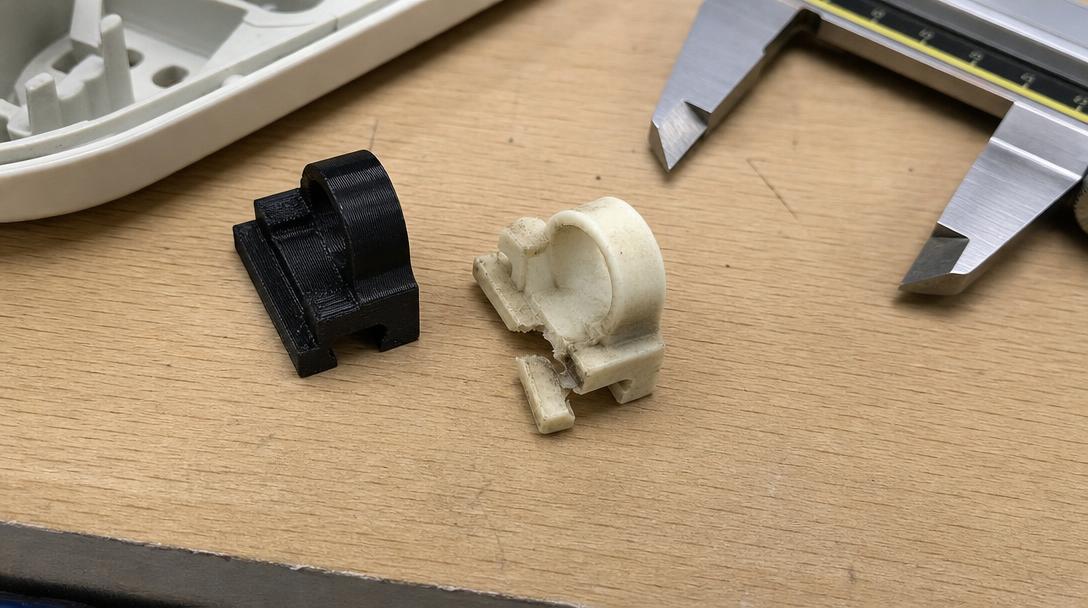
Can a Broken Plastic Clip Be Reproduced with 3D Printing? A Guide to Geometry, Orientation, and Materials
A broken plastic clip can be reproduced with 3D printing, but success depends on understanding how the clip flexes and which surfaces it grips—not just copying its outline. Examine the broken part together with its intact matching counterpart to identify the dimensions, locking tab, and flexing arm. This helps ensure the new part not only fits into place but also avoids unnecessary stress during use.
First, identify the clip’s function and failure mode
A clip may hold a cover closed, secure a cable, or hold two housings together so they can be separated. These functions involve different loads. If the part stays installed under constant tension, flexibility and fatigue matter; for a cover that is opened only occasionally, the force needed to install it and how securely the lock holds are more important. Examine the fracture surface: a break at the base of the arm, a crack at a sharp corner, or wear on the tip of the locking tab can indicate which part of the design is under stress.
If possible, measure an intact example of the same part without removing it. The width of the clip slot, wall thickness, height of the locking shoulder, and how much the part flexes when installed are key reference measurements. Do not rely only on the two halves of the broken part; material may have broken off or deformed during the failure. When taking photos, place a ruler in the same plane as the part to help show proportions, but remember that a photo alone cannot replace precise measurements.
Measurement table: why each detail matters
| Feature to check | How to inspect it | How it affects the design decision |
|---|---|---|
| Slot width | Measure the intact counterpart and the mounting channel | Determines the fit between a tight insertion and looseness |
| Length and thickness of the flexing arm | Compare the broken area with an intact example | A short or thick arm may be harder to flex; the base carries the load |
| Locking tab | Record its height, entry ramp, and retaining face | Affects ease of installation and how securely the clip locks |
| Mounting direction | Mark the direction in which the part is installed and removed | Determines print orientation and how the layers are positioned relative to the load |
| Operating environment | Note heat, sunlight, oil, cleaning products, and vibration | Helps determine the material and its limits in use |
Design the flexing arm for FDM printing
If the clip arm works like a spring, sharp inside corners concentrate stress in a small area. Adding a smooth transition where the arm joins the body helps distribute the load over a wider area. The entry ramp at the locking tip makes it easier to snap the part into place, while the retaining face keeps it from coming back out. Do not confuse these two surfaces: a larger ramp may make installation easier, but reducing the retaining shoulder too much can weaken the lock.
Orientation matters because FDM parts are made in layers. If the clip arm is loaded during bending in a way that pulls the layers apart, the risk of cracking may increase. Whenever possible, orient the model so the arm’s main bending stress does not separate the layers. If printing the part in one piece is not essential, you could also consider splitting the design or making the arm’s connection to the body wider. However, there is no single orientation that works for every part: consider the clip’s shape, its orientation on the printer, and where the load is applied together. How print orientation affects part strength offers a useful framework for making this decision.
Material and test print
Do not choose a material based only on the label “strongest.” A rigid clip may be difficult to install, while a more flexible part may gradually lose its shape under a constant load. Ambient temperature, sunlight, and chemical exposure should also be considered. To review material options and their suitability for your intended use, start with the available options on the FDM printing materials page.
Instead of printing the entire part for the first test, prepare a short sample that includes the locking area and mounting interface. This lets you check the fit while using less material. Check in order whether the sample installs easily, whether the locking shoulder engages with the slot, and whether the part bends excessively at the same point when removed. If adjustments are needed, do not change several dimensions at once: first adjust the clearance, then revise the arm geometry separately. This makes it easier to tell which change affected the result.
- If the force needed to install it is too high: review the entry ramp and how much the arm can flex.
- If the lock does not hold: compare the shoulder height and slot dimensions with an intact example.
- If it cracks at the base: smooth the corner transition and reassess the load path and print orientation.
- If the part remains loose: check your measurement reference and verify any print-related dimensional differences with a small sample.
When is a redesign needed?
If the clip is part of a safety lock or a connection that affects human safety, do not assume it is suitable based on appearance alone. An expert who understands the load, environmental conditions, and potential consequences of failure may need to assess it. If the part is difficult to measure, document the fracture surfaces, intact counterpart, and mounting location together. You can also consult the guide to measuring a broken plastic part for the process of creating a production-ready model from a broken part.
Once you have the part’s photos, measurements, and operating conditions ready, the file can be checked for production suitability before printing as part of the 3D printing service. If you have a model file, you can estimate the cost using the 3D printing price calculator; examples of similar small parts may be found in the guide to appliance spare parts.






 Türkçe
 العربية
 Русский
 فارسی
 Deutsch